Product Description
Polish Airstream Trailers With A Drill or Grinder
Every Airstream Camper owner dreams of their trailer shining like it was when it left the showroom floor. With our Airstream Polishing Kit, dreams become possible.
The all aluminum exterior of Airstream Trailers dulls quickly and requires frequent polishing to stay shiny. Doing this by hand can take weeks. By using power tools and buffing wheels and compound, you can reduce that time down to hours, usually less than 30 if the trailer is in decent shape.
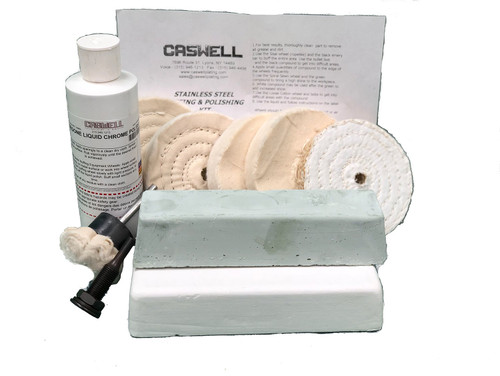
The kit includes an arbor adapter, to mount the buffing wheels in a chuck tool, like an electric corded drill (cordless lack the required power), and a Grinder/Buffer adapter to mount the larger wheels in an angle grinder.
The kit includes:
- 2 x 8" diameter Loose Cotton Buffing Wheels
- 2 x 4" diameter Loose Cotton Buffing Wheels
- 2 x 4" diameter Spiral Sewn Cotton Wheels
- 1 Jumbo Black Buffing Compound (step 1)
- 1 Jumbo Brown Buffing Compound (step 2)
- 1 Jumbo White Buffing Compound (step 3)
- 1 Arbor Adapter
- 1 Grinder/Buffer Adapter
- 1 Wheel Cleaning Rake
- 4 x Microfiber Cloths
- 1 Bottle Glare Professional Polish
Additional Items Required:
- Electric Drill (corded) or Angle Grinder
- Paint Stripper (if clearcoat present)
- Pressure Washer
- Wax or Aluminum Sealer
Step 1
Start by removing any clearcoat from the aluminum. Paint Stripper can be obtained at any hardware store. Follow directions and cautions on the can.
Step 2
Pressure wash the exterior to remove any dirt or debris remaining
Step 3
Evaluate the condition of the aluminum. Heavily oxidized or scratched finishes should be buffed with Black Compound first, with the Spiral Wheel. If the condition is decent, the Black can be skipped. Move to the brown, then white compounds. This step should be performed out of direct sunlight over the course of a few days. Read the complete instructions provided with the kit, and practice on some scrap metal first.
Step 4
Use the Microfiber cloths and Glare to remove any light swirls or scuffs.
Step 5
Optionally, you should seal the aluminum after buffing to prevent rapid oxidization and dulling of the metal. We recommend Collinite Wax as a short term solution, or Sharkhide protectant as a long term solution.

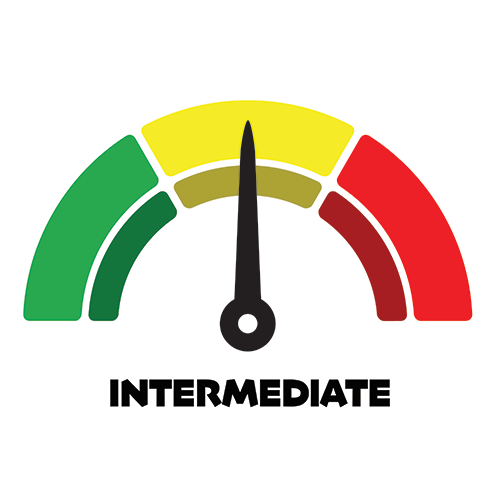
Recommended Skill Level

Intermediate level products require some extra work before use, or multiple steps to achieve end results. Intermediate level products can certainly be used by novices, but extra time, patience and research will greatly help get great results.
Safety Information
 WARNING: Cancer or birth defects - www.P65Warnings.ca.gov
Product Videos
Product Reviews
Important Information
Additional Equipment May Be Required
For Our Tank Plating Kits:
- Copper Pipe for tank bar
- Copper Wire to hang items
- Small amount of electrical wire to make connections
- DC Power Supply - Included In Some Kits. Check kit contents on web site
- Optional Rinse Tanks (or rinse over the plating tanks with a water bottle)
- Other minor household items may be required, such as gloves, water etc.
For Our Anodizing Kits:
- DC Power Supply (Standard Kit Only)
- 1 Gal Battery Acid
- Dyes (if desired)
- Optional Rinse Tanks (or rinse over the plating tanks with a water bottle)
- Other minor household items may be required, such as gloves, water etc.
Learn More Before Buying
You can purchase our Caswell Plating Manual and learn how to use the kits, before purchasing a kit. Simply Order Here. When you are ready to buy, we will discount the price of the kit.
Already Have Our Plating Manual?
If you are ordering a plating kit that contains our Plating Manual, and you already have our Plating Manual, you can remove it from all kits that contain it and save $30 per kit. Just use Coupon Code NOMANUAL in your Shopping Cart at checkout.


